

Properly installed exterior plumbing can serve homeowners for many years, but only if it’s cared for correctly. In colder regions where freezing temperatures are common, that care must include preparing the system before winter. Winterizing at the end of each season is more than a routine chore – it’s a preventative measure that saves money, prevents emergencies, and ensures your irrigation and plumbing stay reliable year after year.
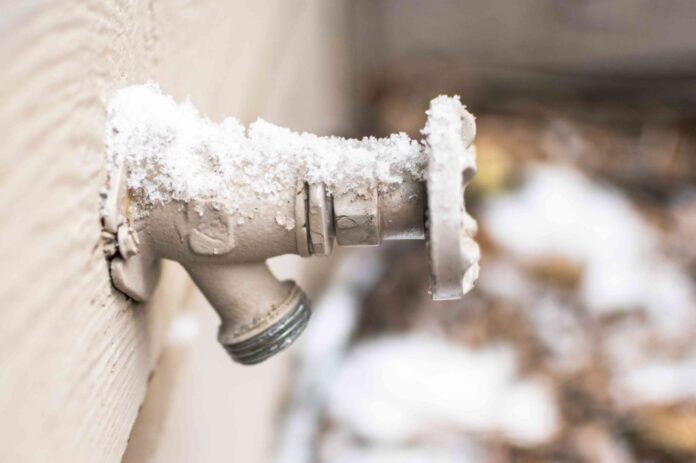
When temperatures plunge below freezing, any water left inside pipes, hoses, or fixtures can freeze, expand, and burst the material holding it. This can cause costly leaks and serious property damage. The solution is straightforward: remove or protect the water in advance.
The Basic Problem
Winterizing plumbing and irrigation systems isn’t something experts recommend just for the sake of doing so. Exterior plumbing faces a very real problem, according to Beehive Plumbing in Utah’s Salt Lake City region. That problem is the potential for water trapped inside a system to freeze and expand. It’s a recipe for plumbing disasters.
Consider this: a seemingly minor crack in a faucet line can stay unnoticed until spring, when thawing water suddenly pours into your basement or crawl space. Repair costs can easily surpass hundreds or even thousands of dollars.
- Expansion is relentless – ice can exert pressures exceeding 2,000 pounds per square inch.
- Plumbing isn’t flexible – copper, PVC, and even PEX have limits before splitting.
- Damage spreads silently – by the time leaks are visible, water may have already infiltrated walls or foundations.
In Utah this risk is greater because their region sees bitterly cold winters combined with dry air. Homeowners there who skip winterizing take unnecessary gambles with their property.
Steps to Winter Protection
Getting your plumbing and irrigation ready for freezing temperatures may sound complicated, but it becomes much easier when broken down into clear steps. Think of it as a seasonal tune-up: you’re not overhauling the whole system, just making small adjustments that prevent big problems later. Each step removes hidden risks that could otherwise turn into costly repairs in the middle of winter.
Step 1: Check for and Repair Damage
Before shutting things down, it’s essential to walk through your exterior plumbing and irrigation setup. This isn’t just about spotting obvious leaks — it’s about strengthening weak spots.
Examine hose bibs, shut-off valves, caulking around penetrations, and sprinkler heads. Replace worn washers or fittings, reapply caulk where gaps have formed, and tighten any loose hardware.
A simple repair now prevents stress later. Imagine a weak sprinkler head joint: if left unrepaired, frozen water can shatter it entirely, requiring not only a replacement head but digging into frozen ground to make the fix. A small repair in fall is far easier than a major excavation in February.
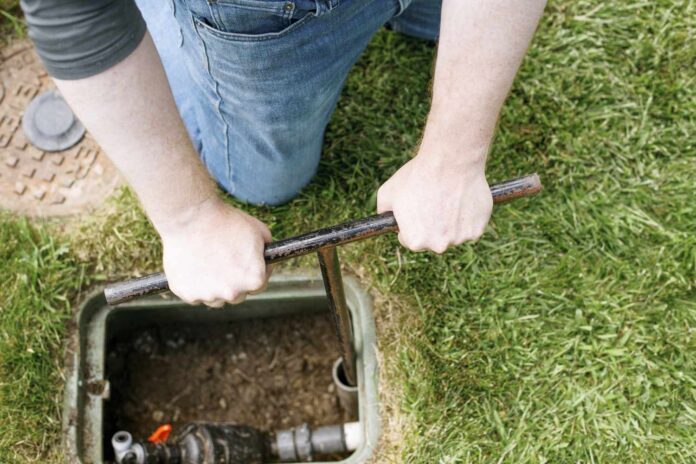
Step 2: Shut Off the Water Supply
Once repairs are handled, the next line of defense is shutting off the water supply. Most homes have dedicated shut-off valves for exterior plumbing, typically located where the pipes exit the house. Turning these valves clockwise until tight ensures no additional water feeds the outside lines.
Don’t stop there — after closing the valve, it’s smart to double-check by briefly turning on the exterior spigot. If water still flows strongly, you may have the wrong valve or it may not be sealing properly.
This step often feels routine, but it’s critical. A shut-off valve is essentially the gatekeeper preventing interior plumbing from being exposed to exterior temperatures.
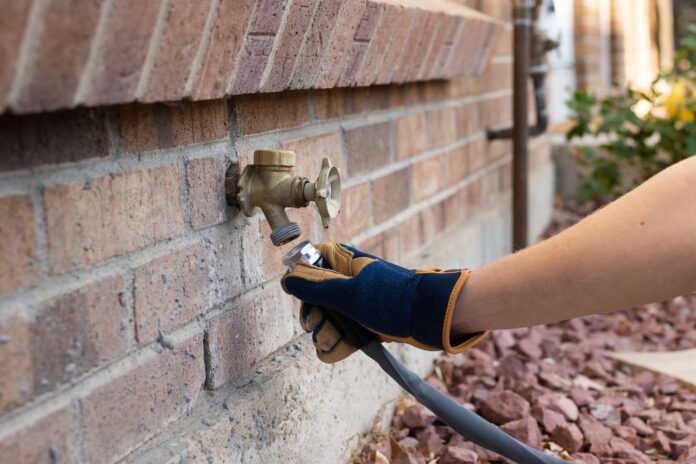
Step 3: Disconnect and Drain Hoses
Garden hoses are among the most commonly damaged items in winter. Water left inside expands, cracking the hose walls or splitting connectors. Even if the hose doesn’t visibly burst, microscopic cracks weaken it, shortening its lifespan.
To avoid this:
- Remove each hose from the spigot.
- Hold one end high to let gravity drain water.
- Stretch it out fully on the ground to ensure nothing is trapped inside.
- Coil loosely and store indoors, ideally in a basement or heated garage.
Tip: Avoid tight coiling — bending a cold, stiff hose can create permanent kinks that compromise water flow next season.
Step 4: Drain Faucets and Spigots
With hoses removed and the supply shut off, open every exterior faucet and spigot. Leave them wide open, and don’t rush to close them again. The goal is to let residual water escape naturally.
Sometimes a few drops will linger for hours or even days, but patience pays off. Leaving faucets open prevents pressure buildup if a small pocket of water freezes inside. Think of it as giving your plumbing room to “breathe” through winter.
For added peace of mind, place a small bucket under faucets for a day or two. If water continues to drip, you’ll know the shut-off valve isn’t fully sealed — something worth addressing before deep freezes arrive.
Step 5: Insulate Exposed Pipes
Not all pipes are buried or hidden within walls. Some may run along exterior walls or through unheated garages and crawl spaces. These sections remain vulnerable even after draining.
Insulating exposed pipes is affordable and effective:
- Foam sleeves can be slipped over straight pipe runs.
- Insulating tape can be wrapped around irregular shapes.
- Plastic faucet covers provide extra protection for hose bibs.
Insulation doesn’t generate heat, but it slows temperature drops, buying time and preventing quick freeze-ups. For homeowners in particularly cold regions, pairing insulation with a low-energy heat cable adds an extra layer of defense.
Step 6: Blow Out Irrigation Lines
Lawn irrigation lines are often buried, which helps protect them. However, in areas with harsh winters, pockets of water can still freeze underground. The professional method for complete protection is a blow-out.
Using an air compressor, a plumber forces air through the irrigation system, expelling every last drop of water. This ensures no ice pockets remain, reducing the risk of burst underground pipes or broken sprinkler heads.
While DIY blow-outs are possible, improper air pressure can damage valves and seals. For this reason, many homeowners prefer hiring a specialist for this one step. The cost is usually modest compared to springtime repairs.
Why Winterizing Saves Money
Skipping winterization may feel like saving time, but the math doesn’t add up.
- Repair costs: A burst pipe can easily exceed $500–$1,000 in repairs, especially if hidden leaks cause interior damage.
- Water waste: Leaks that go undetected until spring may waste thousands of gallons of water.
- System longevity: A well-maintained irrigation system can last decades, while neglected ones fail much sooner.
By investing a few hours in the fall, homeowners prevent far more expensive and stressful problems later.
Common Mistakes to Avoid
Even diligent homeowners sometimes make errors when winterizing. A few to watch out for:
- Closing valves too soon – If faucets haven’t fully drained, sealing them traps water inside.
- Forgetting attachments – Splitters, timers, or filters attached to spigots also hold water.
- Improper insulation – Wrapping towels or rags isn’t effective; use proper insulation materials.
- Ignoring early freezes – A sudden October cold snap can cause damage if you wait until November.
Avoiding these mistakes ensures your preparation efforts actually pay off.
Conclusion
Winterizing outdoor plumbing and irrigation systems is a preventative task that pays dividends. By inspecting, shutting off, draining, insulating, and if necessary, blowing out lines, you reduce nearly all risk of costly winter damage.
What might feel like an afternoon’s chore in fall is really an investment in peace of mind. With everything properly prepared, you can head into winter confident that spring will bring a fully functional system — not a series of surprise repairs.


